Monday, August 29, 2011

Learning Something New - QRCodes for the Classroom

In one of my blog posts, I talked about the three mantras for tired teachers, and mentioned that my learning goal of the month was to not only learn, but also test the pedagogical possibilites of QRcodes. I'm delighted  to say that I followed the two first mantras (learn and try) and am here to share (as part of the last one!) the results of my classroom results.

QR Codes

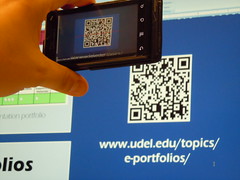
I studied QRcodes, thought of a lesson plan that fit my students' needs and school curriculum. It all started when I told my adult students how the advertisement industry was using QRcodes and Augmented reality in their campaigns (we were discussing about the world of advertisement). They had a question mark on their faces, for they'd never heard of QRcodes or Augmented reality. I explained it, then, there was a brochure in our school with a QRcode. I showed them how it worked. Most of my adult students own a smartphone. So, I sent my customary email of the day and included links to free app downloads of QRreaders for iphones and android phones. Plus, I added they homework in QRcode to make them curious and willing to take their time to download the apps.

I used http://qrstuff.com to generate the colorful QRcodes with amazon links to specific products. We were practicing how to say in different ways how something was expensive or cheap, as explained in my last post:
2. Try, fail, try again in class                                                                                
Learning is not enough. Practice really makes perfect. Test with a plan.
I learned about QR-generators and found powerful free QRreader apps to encourage my students to download them.
I planned a shopping activity with QRCodes to practice talking about things that are too expensive and a bargain.
I invited my students to download the app to their cellphones (I gave suggestions for either Apple and Android smarthphones)
I feel ready to try. Here are the colorful QRcodes I prepared for the activity.
https://docs.google.com/document/pub?id=1_N-ykajXMynurxERnk3E3ZBAkjt-b6JDUBMwn6fkTBg 

I was ready for the classroom trial, a group of Prime 3 (unit 7). I had my cellphone with a QRreader app and my son's iPod touch. When I got to class, I asked if some of them had downloaded the app. Yes, Yes, Yes! So, we were ready. First, I elicited from students the dialogue we were practicing and the expressions they could use to say something was way too expensive or a good deal. Then, I handed in to the groups different QRcodes in different colors. They scanned them, and had a wonderful practice using real products from Amazon. I was careful to choose products that might really interest them (GPS running watch, Nespresso Coffee Maker, Gold bracelet, Watch, Touchscreen digital camera). The students were really into the activity and practiced extensively ways of talking about a purchase. I asked them to stand up and change partners holding their cellphones and their products. So, they had on the cellphone screen the product they wanted to talk about and they could also use the QRreader history to browse other products they had scanned. Some students had the cellphones, others asked about the products. The hard part was to make them stop!!! After that, we talked about the products and prices and what they would really buy, students were curious about how to buy online, what the shipping costs and taxes were, if it was reliable to buy online. What a wonderful discussion in which all the students had an experience to share! I was ecstatic with the positive results of my own learning.

Challenges and tips:

  • Such an activity will only work if your students have smartphones with data plan or ipod touch devices with wifi (and wifi at your school). Or if you bring your own devices to class. 
  • there needs to be preparation beforehand and, at least, some students need to download the scanning app
  • The content you choose to be scanned must be exciting, close to students' reality to make the effort worth it.
  • Encourage other teachers to join you. It is REALLY fun and brain-friendly.
For ideas on how to use QRcodes in the classroom check this PPT:


Cross-posted from http://collablogatorium.blogspot.com

Tuesday, August 09, 2011

Let`s M that Learning!


From time to time new trends and innovative practices take over the language classrooms. From video cassettes and cd players to computers and interactive boards, emerging technology has always been present in the lives of teachers. Some innovations are easy to deal with, others require patience, skills and a lot of creativity. In recent years, a lot has been talked about "m-learning", that is, the use of mobile devices (such as smartphones and tablets) in the classroom.Smartphones and tablets are gadgets that have come to stay and we teachers cannot deny their existence anymore. For teachers who are concerned about being up-to-date with the latest trends, it is paramount that they learn how to operate those state-of-the-art devices and get used to new lingo, such as APPs. By the way, do you know what APPs are?

As a matter of fact, like any other new technology that comes out in the market, the use of mobile devices in the classroom has already caused a great stir and generated a lot of controversial opinions. Our challenge, as teachers, is to find creative and effective ways to use these devices in classroom so as to promote learning in the classroom. Some experts believe that it seems to be a much wiser decision to find ways to incorporate the students' most beloved and inseparable object into the lessons than just saying to turn them off as they enter the classroom. By the way, have you already seen how many amazing (and sometimes unbelievable) things those little objects are capable of? Have you ever considered the colossal potential they have to turn learning into something more exciting and alluring to students of the 21st century?

But some questions might be already popping in your mind:
How do I get started?
How can I effectively use a smartphone or tablet with my groups?
What APPs do I use?

The answers to these questions have not been completely answered yet and the light at the end of the tunnel is still a little blurry. However, the more teachers experiment with this new technology, the clearer the light at the end of the tunnel will be! So this is the time to plunge into this ocean called "m-learning" in search of all the questions that need to be answered. Visit internet pages specialized in m-learning, google your questions, ask students about the APPS they already know and enjoy, explore your mobile devices, connect with other teachers who are already taking advantage of such devices in their classrooms, etc. I don`t consider myself a specialist and I still need to learn a lot about "m-learning". I`ve just had my first smartphone for 2 months but I have already experimented a bit with it and tried to involve the whole group in my proposed projects. Here are some of the ideas I have already tried:

1. Songify
http://itunes.apple.com/us/app/songify/id438735719?mt=8

This is a very popular app that transforms speech into music. There are different tunes you can use, some for free, some paid.The app has been advertised as free for a limited time. The songs can be shared via e-mail, Twitter or Facebook.

I have used this app in two different ways:

a) Students recorded a short paragraph about themselves using the target grammar structure. Then, classmates had to listen to the mixed song and summarize the information they could understand.


b) Students recorded some sentences about themselves using the target grammar structure. After, I (the teacher) asked some comprehension questions (just like a traditional listening comprehension exercise).

* tips:

a) avoid very long sentences or too much information because the mixing might break the information into chunks and change their order, making comprehension a bit more challenging.

b) results are better achieved if speech is loud and clear when recording.

c) re-songify the speech into a different tune if it`s too difficult to understand (depending on the tune you use, it can make a major difference!)

2. Web Treasure Hunts
You can ask your students to search the World Wide Web for some answers needed for some exercises. In one one my groups, for instance, they had to answer questions about popular bedtime stories. Most of them didn`t know all the right answers, so they promptly looked for information in Google and Wikipedia.

3. Camera 

a) Another project that got my students involved in a matter of seconds was asking them to go around the school hallways taking pictures of students, teachers and school staff. This group was learning vocabulary about clothes and physical description, so when they returned to the classroom, I asked them to pair up, show their pictures and describe the people in them.
* I asked the students who didn`t have a camera to pair up with someone else and use the partner`s camera. 

b) Once, I assigned a special homework project and, to my surprise, most students really worked on it. They were learning about likes and dislikes, so I asked them to go home , choose a family member and take 5 pictures of objects or situations that would clearly illustrate what that person liked or disliked. When students came to the next class, they sat in groups and shared their pics and talked a bit about their family members.
* Students who didn`t have a smartphone or tablet with a camera, used their portable video games or traditional digital cameras.

So, have some of these ideas inspired you? I hope so! So, what are you waiting for? The future has arrived, it`s time to try out new ideas. One important thing: share with us what you have done in class, this way we can build knowledge together and improve our skills faster.
Let`s "M" that learning!

Vinicius Lemos

Thursday, August 19, 2010

On Doodling Songs


Originally uploaded by elsvo.


Music livens up the spirit, helps people connect, triggers emotions, brings up memories and cuts through barriers.

On doodling songs 
I came across a Great idea On classroom 2.0.

Find more videos like this on EFL CLASSROOM 2.0

Show this video to make sure your students know what is expected from them.
Find more videos like this on EFL CLASSROOM 2.0
  • Choose a song your students like;
  • Make a powerpoint with each line/chunk of lyrics on a slide;
  • Practice the song; 
  • Print out each slide and give it out to students to draw their pictures.
  • Make a clip and spread the word!
My students had a blast! How would your students react?


Monday, July 26, 2010

Language Learning Tips (updated)

!Update: here's the link to the voicethread created with this video: http://voicethread.com/share/1259177/

If you plan to show this video to your students, please use this link and encourage them to leave their comments on the thread. (=

In the beginning of the semester, I think it is a good idea to discuss second language learning with adult and advanced students.
As teachers, we have a lot to offer on the matter. However, as this semester begins, I decided to give the students a chance to contribute on a group wide discussion, and had them come up with ideas to maximise specifically grammar and vocabulary acquisition.
After this discussion students had 10 minutes to place their ideas into a text, which was then read and recorded.
Here is the result.


Now, there are a few ways to do this, the easiest is using a digital camera to record the clip. You can later compile and edit the segments using Windows Live Movie Maker.

On the technological side, WLMM can capture both video and audio from notebook standard hardware, but the audio might not be very good.

This video will be later uploaded to voicethread in and attempt to continue the student-created pool of tips and tricks to English learning.

Thursday, July 15, 2010

Embracing Changes

Using our recently acquired skills, Cleide Frazão and I carried out a piloting project this past semester.
Here is our workshop in brief. It focus on using web2.0 in a systematized way, make the most of it and do NOT get stressed out.
Cleide and I are not the savvy type, we have been just starting our digital literacy program, and we both still wonder when the old days of chalk and blackboard will spin back in vogue. But we both share a love for pedagogy, for understanding how our young learners learn best. Technology offers us a broad horizon of possibilities to reach out, engage students in writing and connect with families. Here is our workshop on different media. Choose the one that pampers your reading style best and let us know your ideas and suggestions. What tool are you experimenting with? Do you have a favorite tool?
Prezi


About Prezi

Spent all morning learning how to deal with prezi editor. I had seen it once - no idea where- and  I have to confess it was a bit too all over the place for me until I saw this wonderful presentation on EFL Classroom 2.0.My advice if you will prezi soon: Watch the tutorial beforehand and choose the constrain to back and forward move when you embed. ( if you are a linear kind, like me.)
 Voicethread


About voicethread
We decided to upload our workshop on voicethread and post on the project's wiki. This is our paperless, green way to connect for further discussion and feedback. I am in love with this tool! It provides us the chance of extending our learning opportunities... Amazing!
Scribd 


Issuu


Monday, May 31, 2010

5 Questions for Planning Successful Web-Based Activities

""

This interesting post about Tech Integration raises important pedagogical issues when we are considering integrating web-based activities into our lesson. One important feature of this tech integration is exactly our reflection upon the kind of pedagogical approach we are taking. It´s not technology for the sake of technology, but it is technology with pedagogically-sound, meaningful contexts.

Would you add other questions to the list?

Friday, April 23, 2010

EFL teaching - Superlatives

Check out this SlideShare Presentation:

Superlatives - Class 52, Sudoeste

Hi dear friends,


I'm so proud of my Teens 5 group that I've decided to share their
work with you. They wrote about their family members using superlative adjectives. All I did was to compile their files into a ppt one...the rest was all their work! Hope you appreciate their effort! 
Please take a look


Thanks,

Magda 

Tuesday, April 06, 2010

Cutting movie segments.

This video assumes you already have a digital version of the video file. (Digital video files can be ripped from DVDs, VideoCD or BluRay. There are many programs that make this conversion, I use DVD Shrink.)

Even though Windows Live Movie Maker is a practical and simple solution, it has limitations regarding file type, it will handle .avi (today's standard for shared SDTV media) well but it won't open other popular formats like .flv (flash video from the web) or HDTV's standard .mkv.
Also the settings need tuning if you want to work with widescreen (16:9 and 16:10) files.
Another downside of using WLMM is the output format: it only exports video in .wmv. Although .wmv files are easily uploaded to youtube some third party software are not able of playing it (this is not an issue unless you work with different platforms, like a Windows desktop and a Unix/Mac laptop).

The mentioned keyboard shortcuts are:
'j' for frame-by-frame backwards
'k' for play/pause
'l' for frame-by-frame forward


Active and passive websharing.


There is enormous hype around Web 2.0, using it effectively, however, has been difficult for most of us. Teachers are usually much more excited than students when it comes to creating content on-line. One of the reasons for this is that students are 'web lazy', that means they do not wish to create new accounts for projects (face it, they already have e-mail, IMs, Orkut, Facebook and Twitter accounts to name a few).
The reality is that the Web is still used for passive information exchange by most users, who are open to receiving content but uncomfortable with creating it. With that in mind, here are two suggestions on how to use the Web with your groups without requiring students to create content.
First let me tell you about Glue: Glue is a cross browser tool that allows users to share likes and dislikes in one click. After the user has liked something and made a comment, it is categorised and displayed in a user friendly web page.
Go to the Glue website and install the tool bar. It will load when visiting websites such as imdb.com, wikipedia or amazon.com. This makes it easy and simple to make suggestions on books, movies, music and topics for students.

This came in surprisingly handy for Movie Talk; since students watch segments from many different movies I post them (and others who didn't make the cut) on my Glue profile and students can see the suggestions on my Glue profile without having to log in.

Second on the list is Twitter. If you have a twitter account you can use its hashtag and search functionality to let absent students know what happened in the class. This works naturally for teens and young adults who know how to use Twitter, but a quick guide on the first class is necessary when dealing with older students.
All you have to do is teach students how to perform a search on twitter for their group's code as a hashtag (our naming system helps by providing unique codes for every group).
I have a Thomas Flex 6 group on Saturday, so their tag is #TF6S (notice tags do not allow '-'). After the class I log on to twitter and post the tag, followed by the pages we covered and the homework assignment. This makes it possible for absent students to catch up and do the homework. Best part is that it takes less than a minute to post and you can do it from your mobile.

Hope you enjoy the suggestions.

Thursday, February 18, 2010

A site for elementary teachers

Guys, I've just found a great site called Poisson Rouge. I'm sure elementary teachers will profit from it. It's very visual and great to be used in the mimio. They offer over 200 games and interactive activities that include a vast array of topics, like music, numbers and art.
Interactive games include real world applications and everyday objects. By clicking on images, you are taken to a game or activity. By naturally exploring, children will learn to grow their minds and their creativity. For example, when you click on the clock, you are taken to a game where you can move the hands on the clock to match the correct digital time that is being displayed.
In the bottom right hand corner, you can see pictures of castles with a Greek Flag, an English flag, a French Flag and a Chinese Flag. These flags represent the languages that are used in a specific game. When you click on one of the castles another castle appears. By scrolling over areas of the castle, you can learn categories in these languages of different words like toys, animals and numbers.
Teachers can use this site to let their students simply explore. They can even create a scavenger hunt of their own list of items and have students try to find them. The simple activities are great enough on their own for vocabulary reinforcement and practice.
Because there is no main text on the site, creators decided to give parents and teachers who are preparing lesson plans a quick guide to all the games, activities and animations on the site.
With so many engaging activities and games, your students may get lost in this exciting site! I have to say that I did! Hope you enjoy it.

Tuesday, February 09, 2010

PowerPoint X All the rest


It’s amazing all the effort we have been putting into adapting to the world of technology in the classroom. It seems that the need to naturally insert the computers and projectors in our lesson plans has fallen on top of us as an avalanche. Now we’re right in the middle of it and we are working hard to survive.
Many of my colleagues are investing time and money in this venture and Powerpoint is definitely the most popular topic in the conversations I could participate. The reasons for that are very easy to understand after observing a good lesson prepared in Powerpoint. The visual gain is enormous. We can organize the content better and it’s great to work with pictures, making flashcards obsolete. There are a lot of activities that can be developed using Powerpoint, and in that our friend Lilian Marchesoni is an expert. It’s really fun to play games and the animations make our presentations interesting. The ideas are many and knowing how helpful they are we share them with other teachers. Our wiki (CTJconnectED) is the place to share and explore them.
However, I can’t help thinking about all the doors that the computer-internet-classroom combination may open. We can bring the world into your classrooms and probably the only amazement will be our own. The internet is part of our students’ lives just as the television is. We should take advantage of this fact and foster the so desired language production and aquisition through this means, which is very natural to them. Wikis and blogs are two very powerful tools to create a link with the students, sometimes even with parents. Storytelling now is something much more stimulating and there are many sites that allow you to create your own multimedia stories. Pictures, songs, articles, they are all a few clicks away. And of course, we have to mention social networking. Visiting Orkut, Facebook, Twitter, MySpace, and others are part of the routine of most internet users.
I’m certainly a Powerpoint fan, but our students will benefit a lot if we use the internet as a production enviroment. The students will produce under our supervision. Besides the e-folder exercises that are meant to help our learners with reviewing the class content, we may encourage them to write blog posts, embed videos they create at the class’ wiki or blog, use their own pictures to tell a story or as a trigger to a discussion thread. Let’s remember that there is a huge number of online resources to use in class and many of them may be used by the students at home. Powerpoint is a great tool, but we’ll benefit a lot from learning how to apply those other online resources in our pedagogical practice. Some good online tools we can use are Voicethread for storytelling or anecdotes, wikis or blogs as a way of communication among students and teachers, You Tube and Flickr as source of images and videos, which we can embed in our wikis or blogs with just a few actions. Take some time to get to know them and in case of doubt talk to the EdTech team.

Thursday, January 28, 2010

Ice breakers


and now..., originally uploaded by Zero Rae.


An ice-breaker...
  • Opens the way
  •  Sets the course
  •  Clears the path
  •  Facilitates the movement
  •  Cuts through barriers
  •  Breaks resistance
Icebreakers are more than fun and games. They are activities that help people connect. These creative interactive processes open the way to learning. I have been collecting activities that I usually use and adapt from. I have been thinking about how to add a digital twist to old timers.
I could take my students to the computer lab and ask them to share some of their pictures -  
I could ask students to choose some pictures that they relate to and ask them to talk about themselves using the images.
Students could get in small groups and guess information about  each other through the pictures they chose.
I've read about this great site on Life is a feast,  you can learn more about this tool on her blog post. I really liked this web2.0 because it's user friendly and we can make visually rich quizzes to enliven our classes. I used Photopeach to upgrade an ice breaking activity called 
        What's True? 
Students write sentences about themselves, preferably something funny or unusual that most people wouldn't know. one of the sentences should be a lie. students read their sentences aloud to the group and they try to guess which one is the false one.

This simple interactive activity can help you set the course and start a great semester! Have fun!


esl warmer on PhotoPeach


 For the very beginning of the semester we could use wordle to design an ice- breaker.

You could write a text about yourself, turn it into a cloud using wordle and ask students to guess pieces of information about you using the words. Students could do the same in the computer lab using wordle or on a blank sheet of paper.
This activity might generate lots of interaction and exchange of information among your learners.
What tool would you use to design an ice-breaker? How would you use it?


Thursday, November 12, 2009

How about planning a digital trip in class? With Google Earth we can talk about cities and we can actually go there! I'm sure students will benefit from getting to know where the cities are before they talk about them. I used one of my favorite tools and planned an information gap activity. Student A listens to a couple planning a day in Jerusalem... Student B goes to Hawaii... Students share and plan a day in a city of their choice or compare the two places. How would you use Google Earth in class?

Wednesday, November 04, 2009

Fun Photo Editing Sites

This directory of amazing sites for photo editing - 28 Online Photo Editing Websites to Have Fun With - was shared with me by a dear online friend who lives in Argentina. First, it shows the power of our online communities. Jennifer Verschoor has kindly shared this link because she knew I was into working with images.

I just picked one of the sites, befunky, and tested it. What I loved about befunky is the fact that no logins are required and the effects are really cool. Teens would love to play around with their photos in this photo editing space.


Then, if you explore it, you'll see that you can make fun editing in your own photos to add them to your school digital resources, to enliven classes. Most important of all, you could try out some of those sites to make your classes even more student-centered by

  • encouraging your students to remix their photos and tell a story.

  • sharing their best remixes and have a class vote

  • having students choose a topic, take a photo and edit the photo with text

  • students sharing their photos remix and the others asking questions about them.

  • encouraging students to remix a photo to match with a reading

  • encouraging a photo remix plus poetry (like in this haiku project)

Another interesting resource for image editing,yearbookyourself, is the one Nik Peachey points out in his blog . Really fun to play around with.

Which tool from these resources would you give it a try and what kind of activities do you picture doing with your students?

Wednesday, October 21, 2009

Halloween for teens (vuvox)

I've been writing digital plans with Vuvox. Whenever  I'm learning something new, I have to do it at least a couple of times or I foget. I decided to write another digital halloween plan with Vuvox, but this one is for teens. students are invited to take a digital journey while learning about this spooky holiday. If you decide to give Vuvox a try do not forget to publish your presentation as public or you won't be able to embed your great plans!  Enjoy!
Here is a short tutorial.


Halloween for young learners ( vuvox)

How many times have you realized that Halloween was just around the corner and had absolutely no time to plan a topic related activity for your kids? Well...It has happened many times to me and I ended up having a fast trick or treating in the end of the lesson.
 Inspired by Web2.0 for educators, I decided to write a digital lesson plan that I could rely on for some holiday fun.  A plan that would blend technology and creativity to motivate learners.
 I chose  vuvox as an aggregator and I started by downloading  a Disney movie to pre teach vocabulary. I had some problems uploading at first, I learned that Vuvox recognizes flv for movies and  that I needed a converter. I used a user friendly one called Prism.
I wanted to promote opportunity for sharing written work with an authentic audience. I read Larry Ferlazo's post about storybird and Tikatok and decided to add them to my plan. I printscreened the cover of the books and used the hotspot icon in Vulvox to hyperlink.
     I hope I find the time to plan more presentations like this one. we could have one for each level to avoid repeating the same activities. What about giving Vuvox a try?
Reminder
 File format (vuvox).
    Audio - mp3
    Image - jpeg
    Video - flv


Thursday, October 15, 2009

How to tell a digital story using Voicethread

How many times have you written a composition about a vacation you've taken? Many, right? However, how many times have you written a digital story about a vacation you've taken? Never, right? Guess what? Now you can do it. Better yet, you can ask your students to do it! Isn't it great! And this is only one of the things you can use Voicethread for. Having said that, take a look at the Lesson Plan I've prepared to my students. What are you waiting for? Pretend you are one of my students and try to write your own digital story. Please, after doing so, post a comment to tell me how your experience using Voicethread was.

Lesson Plan

Title: Sharing your vacation using Voicethread

Objective/ Overview of the lesson plan: By the end of the lesson, students will be able to create their Voicethread accounts and use this webtool to talk about their vacation. Students will be asked to comment on at least two of their classmates' work.

Level: This lesson plan was designed for intermediate and advanced teenage students.

Time frame: Students will be given 7 days to talk about their vacation using Voicethread.

Procedures and Steps:

1 - Tell a digital story about your vacation using "Voicethread". The tutorial below will help you. Please, watch it carefully. Also, as soon as you finish your digital story, don't forget to allow public access to it. All you have to do is click on the "menu" icon on the bottom right of your digital story, click on "edit" and then click on "Publishing Options". Finally, click on the first, second and forth boxes and then click "save".


2 - In case you need extra inspiration, click on the links below and take some time to watch two of the digital stories I've created a while ago. One is about one day of my life as a teacher. The other one is about my last vacation, which was also my honeymoon. Have fun!


Monday, September 28, 2009

Social Networking with Basic Levels


If we ask our students if they are part of an online community, probably ninty nine percent of them will say they have an account in orkut. Orkut is a wonderful social networking site and is a way to connect students with things they love doing and with people they like to share things with.
However, orkut as social networking has its limitations. It works more like a message board and it lacks features that can really connect students in a more meaningful way. Not only that, it is also public and does not allow you to control its features and decide who joins the community, what questions you can ask joining members, and so on.
I have been using ning for some time and have found out that my students really enjoy using it.Up to now, I had used with more advanced levels. However, most recently, after unsuccsessfully trying to set up a wiki in pbworks for my Juvenile 2 students (aged 11 to 13), I decided to give ning a try. To my surprise, it worked really well and students loved it. I also got rid of the problem I was having with pbworks that seemed to heavy to load.
Let me summarize some of the features of ning that in my opinion make it the perfect social networking site for learners from basic to advanced levels.
- Chat - ning has a chat feature that can connect the whole class. Besides having a group chat with your class in the computers lab, you can also schedule a chat session with your students at any time. Not only that, but you can also have a guest to join in and chat with you class.
- Videos/photos - your students can add videos of their own or pictures to their albums.
- Forums - you can create forums to discuss any topic.
- Music - the music feature allows your students to add their favorite music.
- Customization - Your students can choose colors and pictures of their favorite soccer teams to customize their pages.
- Blogs - you can create blog posts and have your students to create theirs with pictures, tags, etc.
- And some others that you can explore by yourself.
How am I using ning?
I am now using with my 12-year-old juvenile 2 students at Leonardo. I always write step by instructions in Portuguese on how to join the community and how to customize their pages. I first set the community sign up and open to anyone and public so that the ones joining in do not need any approval. I later change the settings on that to avoid unwanted members.
I take the whole group to the computer lab for the sign up and they generally get very enthusiastic about it. I also let them have a group chat. The chat feature is the one they like the most. I frequently catch them chatting with each other in the evenings from their home computers.
I have just started and now I am teaching them to blog.
If you decide to give Ning a try, I would be more than happy to help you set up your community.